Navigation and Model View
On this page:
Fly 

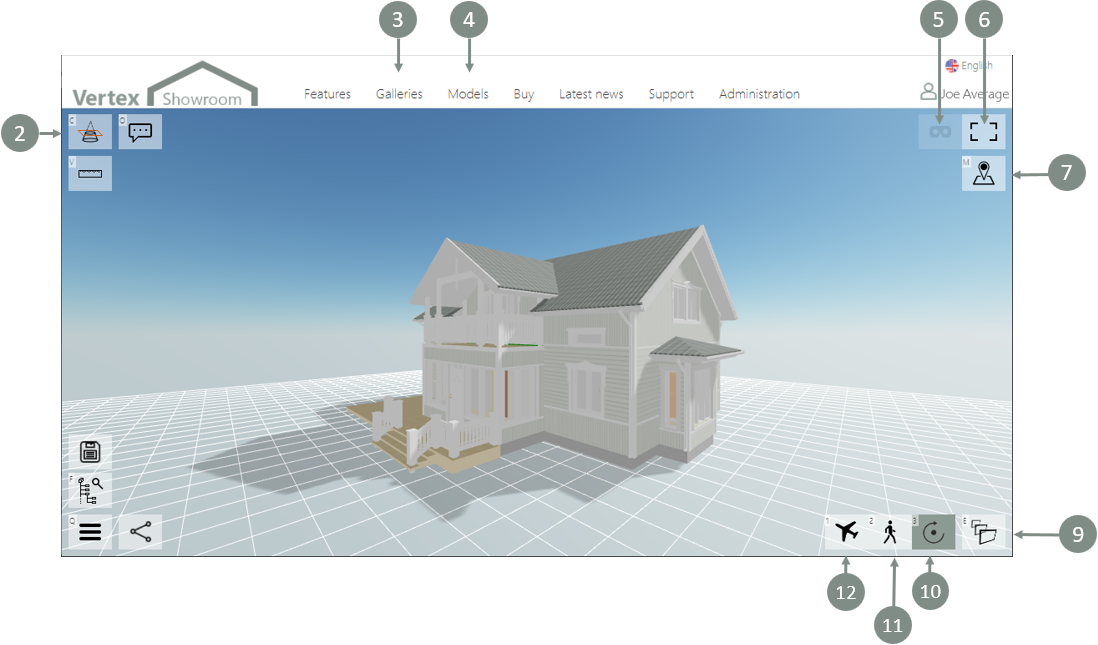
Shortcut key![]() . In the fly mode, the camera is moving to the view direction of it. You can move the camera up and down with the height slider on the right side of the model window.
. In the fly mode, the camera is moving to the view direction of it. You can move the camera up and down with the height slider on the right side of the model window.
Moving on desktop
Use the ![]()
![]()
![]()
![]() keys to move the camera in the model. You can change the direction of the camera by pressing the left mouse button and turning the orientation to the direction you want.
keys to move the camera in the model. You can change the direction of the camera by pressing the left mouse button and turning the orientation to the direction you want.
Moving on mobile device
Open a virtual joystick  by touching the bottom part of the screen. By using the joystick, you can move around the model. Lifting the finger up automatically stops the movement and hides the joystick.
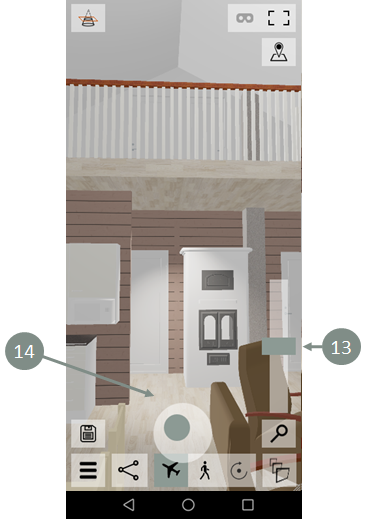
Move up and down
You can move the camera up and down with the height slider  on the right side of the model window.
Walk 

Shortcut key![]() . In the walk model the camera is moving in a constant height.
. In the walk model the camera is moving in a constant height.
Moving on desktop
Use the ![]()
![]()
![]()
![]() keys to move the camera in the model. You can change the direction of the camera by pressing the left mouse button and turning the orientation to the direction you want.
keys to move the camera in the model. You can change the direction of the camera by pressing the left mouse button and turning the orientation to the direction you want.
Moving on mobile device
Open a virtual joystick by touching the bottom part of the screen. By using the joystick, you can move around the model. Lifting the finger up automatically stops the movement and hides the joystick.
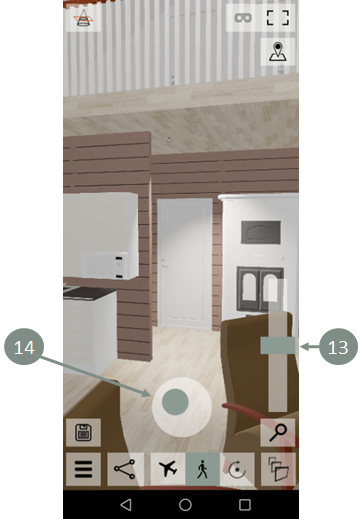
Move up and down
You can move the camera up and down with the height slider on the right side of the model window.
Rotate 

Shortcut key![]() . Rotate the camera by pressing the left mouse button. Zoom in and out with
. Rotate the camera by pressing the left mouse button. Zoom in and out with ![]() .
.

My models 
Models you have added to the service appear here. Newly added models do not have a thumbnail image until they are opened for the first time. You can open, share and delete models. Moving the cursor on top of the thumbnail image reveals two buttons on the top-right corner. ![]() removes the model and
removes the model and ![]() opens the Share dialog.
opens the Share dialog.
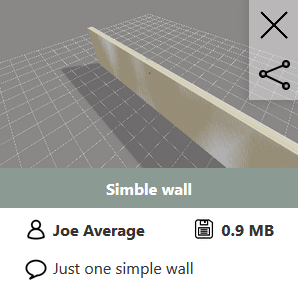
Note: A model does not have a thumbnail image until it is opened in the Showroom service for the first time.
Full-screen 

Press the ![]() button on the top right corner to enter full-screen mode. Press
button on the top right corner to enter full-screen mode. Press ![]() to exit the full-screen mode.
to exit the full-screen mode.
Virtual reality 

Press thebutton found on the top-right corner to enter the VR mode. On desktop devices, the button is disabled if you do not have virtual reality devices connected to your system. On mobile devices the button is always enabled.
For more information about system requirements, please visit https://showroom.vertex.fi/requirements.html.
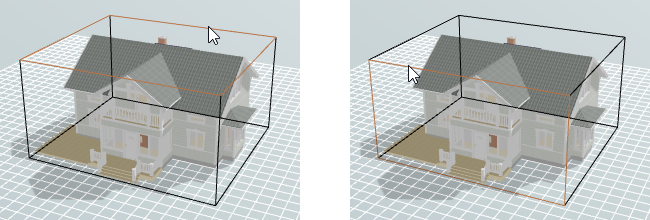
Clip the model 

Click Toggle model clipping (shortcut key ![]() ) to clip the model. A clipping cube is drawn around the model. Rotate the model to view the desired clipping plane of the cube. Move the cursor over the edge of the plane to highlight it. Drag the mouse to clip the model.
) to clip the model. A clipping cube is drawn around the model. Rotate the model to view the desired clipping plane of the cube. Move the cursor over the edge of the plane to highlight it. Drag the mouse to clip the model.
You can hide and show the clipping cube by clicking  Toggle clicking box at the top left corner of the model view (shortcut key
 ![]() ).
).
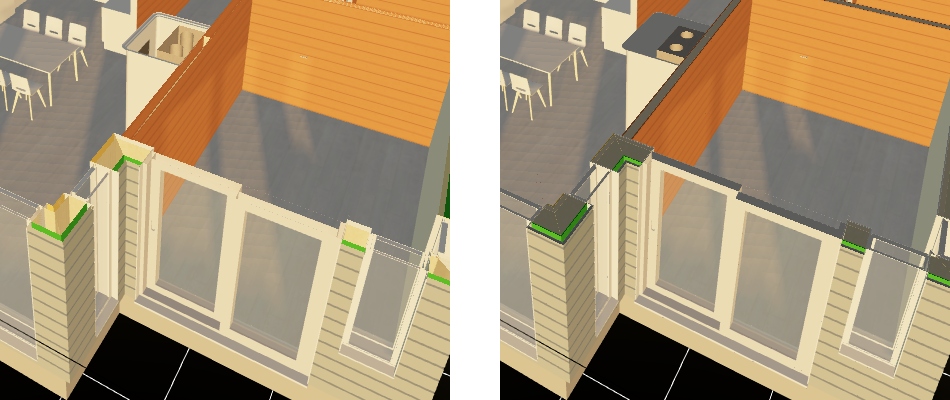
The clipped objects may appear hollow. You can fill the geometry at the cut point by clicking  Toggle filling clipped volumes at the top left corner of the model view (shortcut key
 ![]() ).
).
Click the button again to remove the clipping.
Toggle clipping box
The button (shortcut key ![]() ) toggles clipping cube on and off.
) toggles clipping cube on and off.
Mini-map 

Open the mini-map by pressing the button (shortcut key ![]() ). On the mini-map, the blue arrow
). On the mini-map, the blue arrow ![]() indicates the current position and orientation. Clicking the map with the left mouse button
indicates the current position and orientation. Clicking the map with the left mouse button![]() immediately transfers you to that point, orienting to the center point of the model.
immediately transfers you to that point, orienting to the center point of the model.
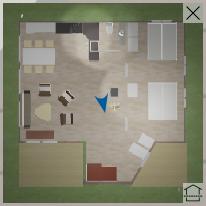
Close the mini-map by pressing ![]() or by clicking
or by clicking ![]() on the top right corner.
on the top right corner.
Set mini-map clip height 
At the mini-map's bottom right corner, you can find the Set clip height button. Press the button to set the current camera height as the cut height to create the map. This is especially handy in building models with several floors. When you move from one floor to another, you can update the map to match the current floor by pressing this button.